Almost every app you install on your Android device connects to the internet to send and receive data. This can be a huge deal if you are on a limited data plan. On the flip side, the smartphone in your pocket is no less than a computer, you have a lot of personal stuff like photos, videos and you do a lot of other things like paying bills online, accessing your bank accounts, managing your social accounts, access important emails, etc. So, to protect your device, restrict, and keep an eye on what apps are connecting to the internet, you are going to need a firewall, just like on computers. In case you are wondering, here is how you can install and configure a firewall on any Android device.
Firewall for Android
To add firewall on Android, we are going to install a free app called NoRoot Firewall. As you can tell from the name, the app needs on root permissions. Since the app doesn’t need any root permissions, it can be used on any device.
In case you are wondering, the inner workings of this app are simple. Once you install the app, it will create a local VPN and diverts all the internet traffic through that local VPN so that it can monitor the requests and allow or deny the connections according to the rules set by you.
Install and Configure Firewall on Android
To configure the firewall on Android, you first need to install the app. So, head over to the Play Store and install NoRoot Firewall. After installing, open the app and tap on the button “Start” the firewall.
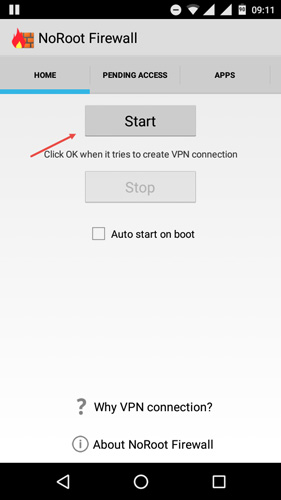
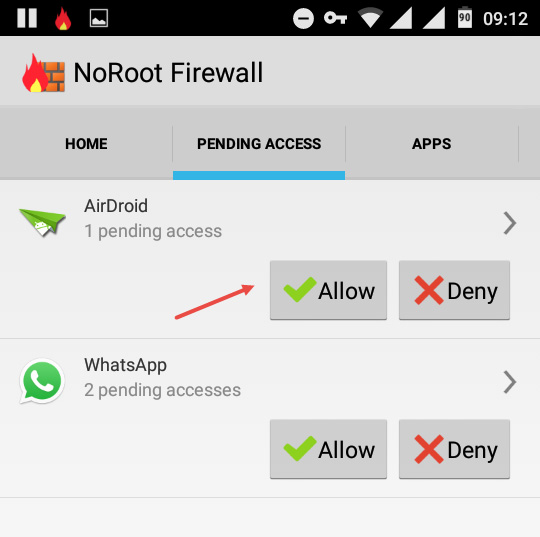
By default, the app blocks all the internet access to all the apps and displays an alert message when an app tries to connect to the internet. To allow access to an app, navigate to the Pending Access tab and tap on the button “Allow.” If you want to deny the access then select the option “Deny.”
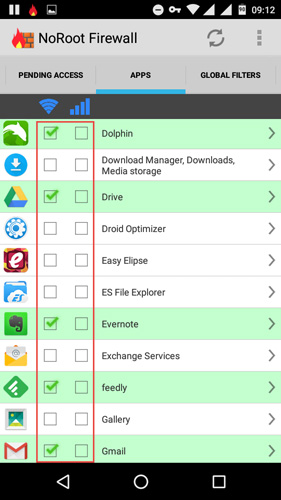
Under the Apps tab, you can select the apps that can access the internet via WiFi and mobile data. The good thing is, NoRoot firewall even allows you to restrict apps based on WiFi or mobile data plan. To allow an app access the internet, simply select the checkboxes under the WiFi and/or mobile data.
To see what apps are being connected to the internet, navigate to the “Access Log” tab. Here you will find all the apps that are connected to the internet.
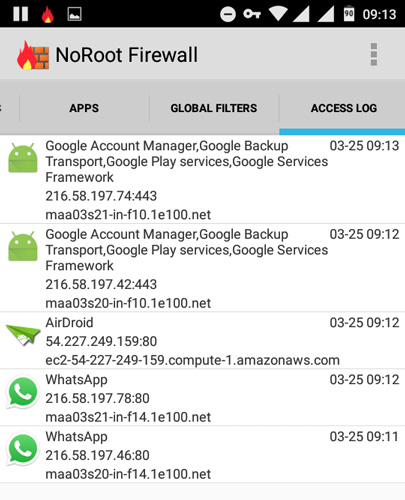
For advanced users, you can create custom filters. To create a custom filter for an app, simply tap on the app visible in the Access Log tab and then select the option “Create Custom Filter.”
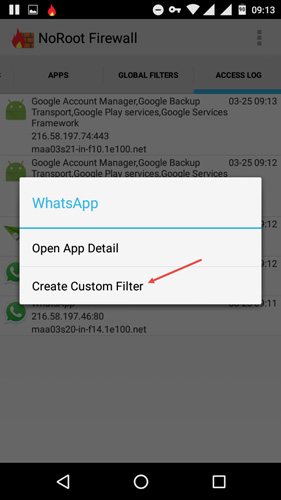
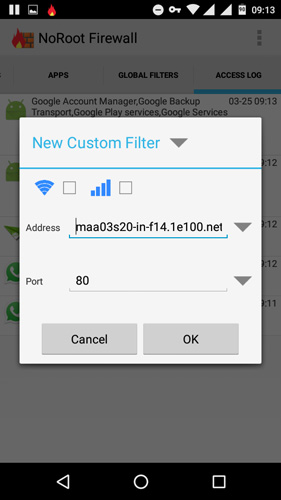
The above action will take you to the Custom Filter screen, here, configure your custom filter and then tap on the button “Ok” to save the changes.
Finally, if you want to stop the firewall, then go to the home screen and then tap on the button “Stop” to stop the firewall. As soon as you stop the firewall, all the apps installed on your Android device will have access to the internet, be it via WiFi or mobile data.
That’s all there is to do and it is that simple to install and configure firewall on Android.
Do comment below sharing your thoughts and experiences and thoughts about add a firewall on Android.

