No matter how you look at it, YouTube is one place where you can find almost any video you want and is also a place for many creative folks that do a lot of crazy things. That being said, downloading videos from YouTube is nothing new.
In fact, there are many software and online services that help you in downloading the YouTube videos. You can even download entire YouTube playlists if you want to. But in recent times, YouTube changed how they deliver videos to you. That is, YouTube now delivers video and audio in separate streams. So when you try to download, audio and video files are downloaded separately in M4A and Mp4 formats respectively. In order to watch the downloaded YouTube video, you need to merge or combine the downloaded video and audio files.
So, if you ever need, here is how you can combine downloaded YouTube video and audio files using FFmpeg.
Installing and Configuring FFmpeg
Merging or combining downloaded YouTube video and audio files is pretty simple and straightforward. Even though there are several programs that can be used for this purpose, we are going to use FFmpeg as it is an open-source and very powerful application.
For Windows 10 follow this: Install FFmpeg in Windows 10
1. To start off, head over to the official website and download the latest build according to your system architecture (32 or 64 bit.). In my case, I’m downloading the 64-bit version.
Note: to find your system architecture, search for “System” in the start menu and open it. Here, you can see your system architecture next to “System type” under the “System” category.

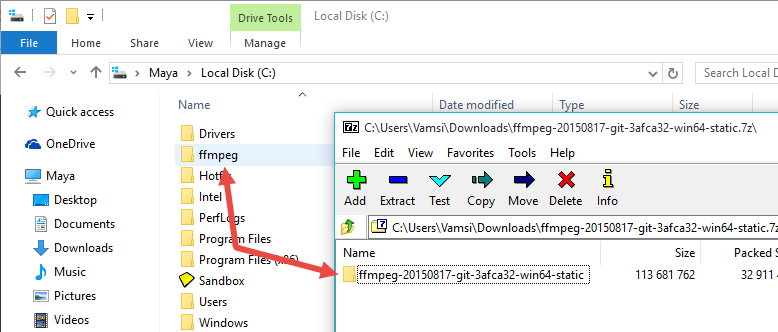
2. Once you’ve downloaded, open the file using 7-Zip or other equivalent software and copy the folder inside it to the C drive. Once copied, rename the folder to “ffmpeg“. The name change will make it easier to deal with.
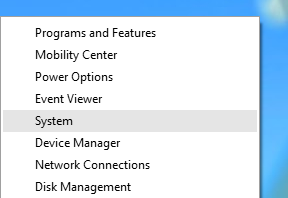
3. The next thing to do is add FFmpeg to Windows path using “System Variables”. To do that, press Win + X and select the option “System.” If you are using, Windows 7, you can search for it in the start menu.
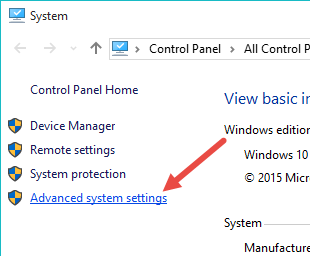
4. In the System panel, click on the link “Advanced System Settings” appearing on the left sidebar.
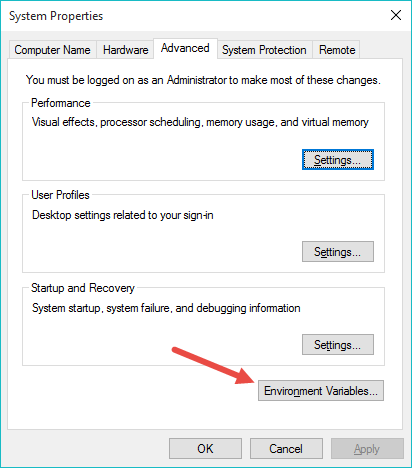
5. The above action will open the System Properties window. Here, click on the button “Environment Variables.”
6. In the Environmental Variables window, select the variable “Path” under System Variables and click on the button “Edit.”
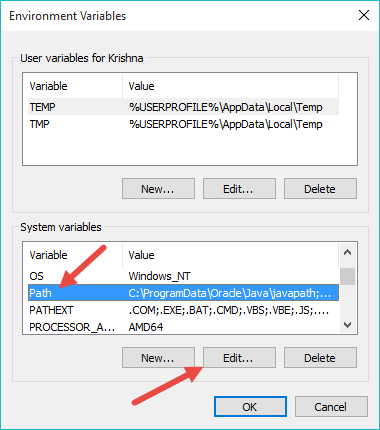
7. Now, enter the path C:\ffmpeg\bin at the end of the line in the “Variable Value” field. Don’t forget to separate the paths with ;. If you’ve stored the FFmpeg folder somewhere other than the C drive then change the path accordingly.

Merge Downloaded YouTube Video and Audio Files
8. After completing the installation procedure, go ahead and download your favorite YouTube video. As you can see, I’m using the KeepVid service to download the YouTube video. As I said before, the audio and video files are displayed separately. Just download the audio and video files.
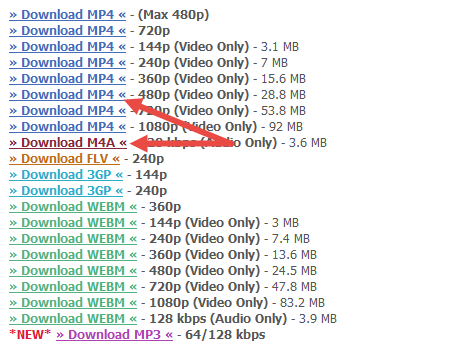
9. For instance, I’m downloading the 480P video file in MP4 format and the audio in M4A format. Make sure the downloaded files have same file names. In my case, the file names are “videoplayback.mp4” and “videoplayback.m4a.”
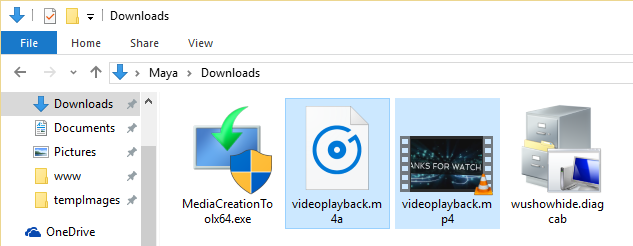
10. Once the files have been downloaded, open the Downloads folder. Here, right-click while holding the Shift key and select the option “Open Command window here.” On Windows 10, you will see the PowerShell option. That will work too.
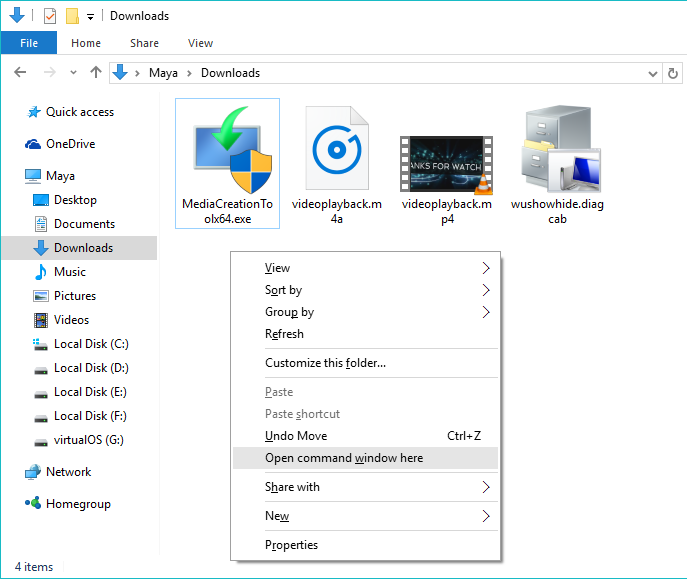
11. Once the Command Prompt(or PowerShell) window has been opened, copy the below command, paste it and press the enter button to execute the command.
ffmpeg -i videoplayback.mp4 -i videoplayback.m4a -c:v copy -c:a copy output.mp4

12. Once the command has been executed, FFmpeg will merge or combine both the files and saves it in the same folder with the name “output.mp4.”
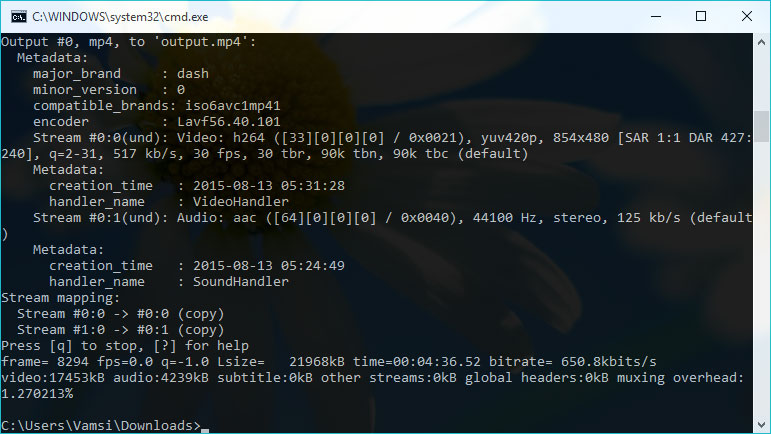
13. If you open the Downloads folder again, you can find the new file “output.mp4.” If you want to change the output file name, then you can do that by simply changing output.mp4 part in the above command.
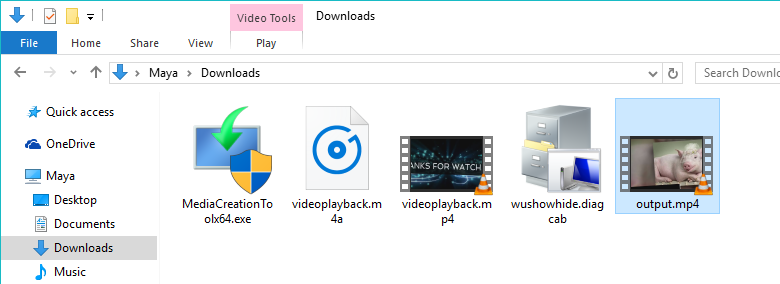
That’s all there is to do. As you can see, it is really simple to combine downloaded YouTube videos using FFmpeg.
Hope that helps. Do comment below sharing your thoughts and experiences about using FFmpeg to combine downloaded YouTube videos.
Image credits: Christiaan Colen
