Having multiple operating systems running on a machine is not a new thing. People working on different platforms need to have their systems booted in Windows as well as other operating systems like Linux or MacOS. This is called dual booting.
When your machine is dual booted, it will get the current time of your location from the system hardware clock. If the hardware clock was set to local time, more than one operating system may adjust it after a DST (Daylight Saving Time) change, thus resulting in an overcorrection. By default, Windows uses the GMT time zone while OS X and Linux uses UTC time zone. Thus, when Windows tries to synchronize with your local time zone after a reboot, it gets confused and shows you the wrong time.
To solve this problem, all you have to do is add a single registry entry in the Windows Registry and you are good to go. Follow the steps below to fix incorrect clock settings in Windows 10 while dual booting.
Note:
1. Before doing anything, make sure that you backup Windows registry, just in case.
2. Though I’m showing this in Windows 10, the same procedure is applicable to Windows 7 and 8.
Fix Incorrect Clock Settings in Windows When Dual Booting
1. To start off, click the on Start button, type “regedit.exe” in the search box, and hit enter on your keyboard. This action will open the Windows Registry Editor.
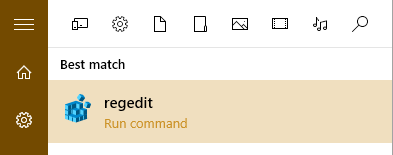
2. In the Windows Registry Editor, navigate to the following path.
HKEY_LOCAL_MACHINE\SYSTEM\CurrentControlSet\Control\TimeZoneInformation\
3. Once you are here, right-click anywhere on the white space in the right pane. Now, select “New” and then “DWORD (32-bit) Value.”
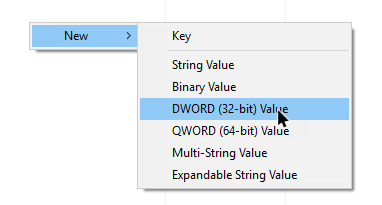
5. The above action will create a new DWORD value, rename the value as “RealTimeIsUniversal.”
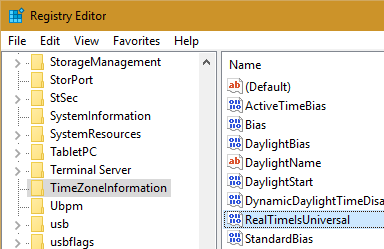
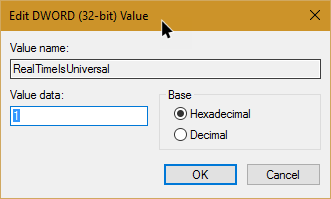
6. Now, double-click the value and change the value data of RealTimeIsUniversal value to “1.” Click on the Ok button to save the changes.
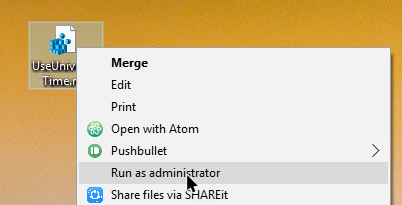
Note: if you are unable to create the key due to permission issues, then I’ve created the registry key for you. Just download this file and extract the contents onto your desktop. Now, right-click on the .reg file and select the option “Run as Administrator”.
This action should install and configure the “RealTimeIsUniversal” key. If you are curious, you can open the .reg file with Notepad to see what is inside the file.
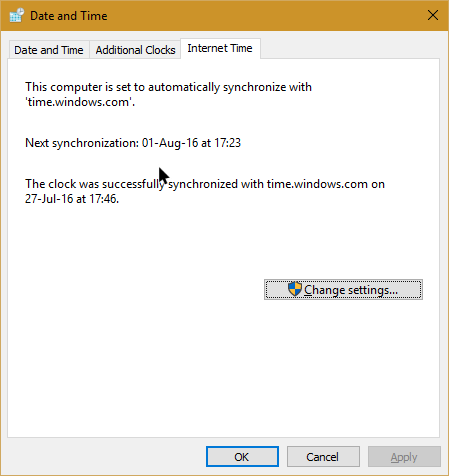
7. After creating the registry key set the current time and time zone on the clock. Open the “Date and Time” window from the control panel, navigate to the “Internet” tab and then click on the “Change Settings” button.
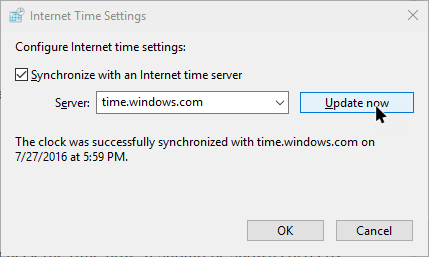
8. In this window, click on the button “Update Now” and your time will be synchronized with the internet.
That’s all there is to do and from this point forward, you will no longer see the wrong time in Windows when you dual-boot with Linux or MacOS. I hope you found this guide useful. Let me know in the comments how this simple tip helped you save the frustration of Windows showing incorrect clock settings when dual booting.

