Block USB Drives in Windows: We all use different USB devices to do a lot of things like storing data, adding peripheral devices like keyboard, mouse, etc. However, you many need to sometimes need to block USB drives in Windows 10.
There may be several reasons like you not wanting people to attach random USB drives into your system or you want to protect your system from USB viruses and malware.
That being said, you usually see the USB devices being blocked in environments like schools, offices, etc. So, no matter what the reason is, it is very easy to block USB drives in Windows. Here’s how to block USB in Windows.
Block USB Drives in Windows 10
Generally, you need to go through Registry edits or Group Policy edits to block USB devices in Windows. However, you can also do the same thing with just a few clicks.
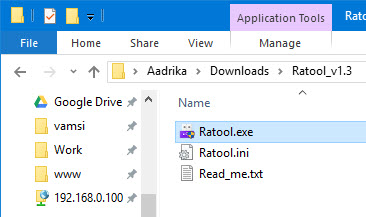
To start off, download the free and portable Removable Access Tool, extract it and execute the EXE file.
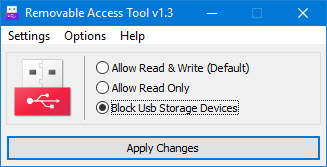
After opening the application, select the radio button “Block USB storage devices” and click on the button “Apply.”
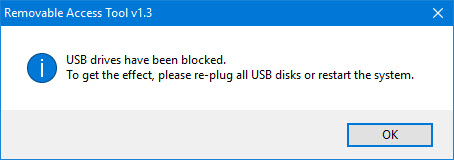
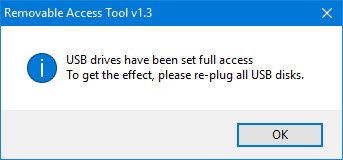
You’ll receive a message telling that you need to replug all your drives or restart the system to see the changes. Click on the button “Ok” to close the window and do as it says.
In my case, I’ve replugged my USB drive and it no longer shows in the File Explorer.
If you want to unblock USB drives then select the radio button “Allow Read and Write (Default)” and then click on the button “Apply.”
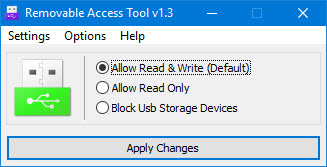
Again, either replug all your USB devices or restart your system to see the changes.
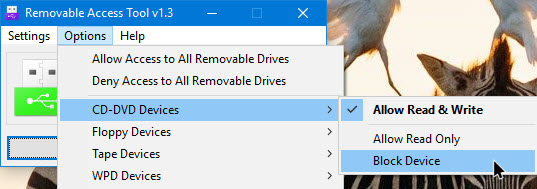
Apart from blocking USB drives, you can block the CD drives too. Just navigate to “Options > CD-DVD Devices” and then select “Block Device.”
If you don’t want other to change the settings then you need to password protect the application. To do that, navigate to “Settings” and then select “Change Password.”
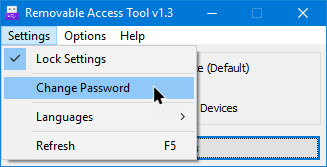
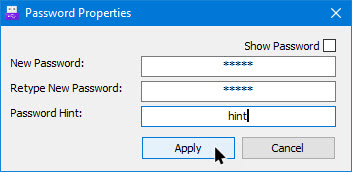
This action will open the Password Properties window. Here, enter your password twice and then click on the button “Apply” to save the changes.
From this point forward, whenever you want to change the settings, you need to provide the password.
Hope that helps and do comment below sharing your thoughts and experiences about using the above method to block USB drives in Windows 10.

