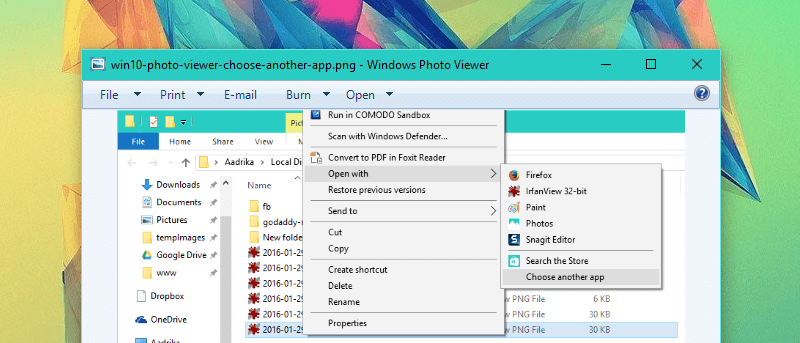
Windows 10 has many great features and was even packed with new and improved apps like Photos, Mail, Calendar, etc. If you ever tried to view an image or photo in Windows 10, the operating system will open it with the new Photos app, which is really good for what it is. The new Photos app enables you to create collections, upload photos to the cloud, import photos from external drives, etc. Taking all that into account, Microsoft chose to replace the default Windows Photo Viewer application with the new Photos modern app.
Even though the new Photos app is pretty good, it is not as fast as the Photo Viewer application available in Windows 7 or 8. That being said, Microsoft hasn’t completely removed the Photo Viewer application from Windows 10. Instead, it just removed the registry keys and kept the application hidden from the “Default Apps” settings. So, if you prefer the good old Windows Photo Viewer app over the new Photos app then here is how you can enable Windows Photo Viewer in Windows 10.
Note: to add the Windows registry keys, you need administrative privileges.
Enable Windows Photo Viewer in Windows 10
Thankfully, enabling Windows Photo Viewer in Windows 10 has been made easy with a simple registry hack.
1. To start off, download this zip file and once downloaded, open the zip file. Windows natively support the .zip extension so you don’t need any third party applications.
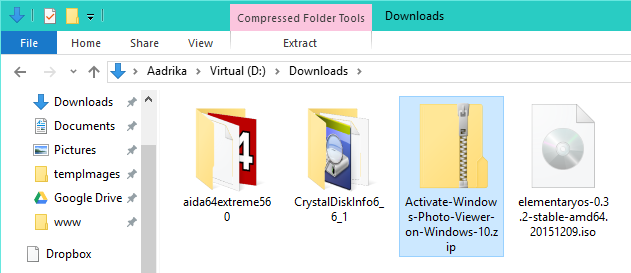
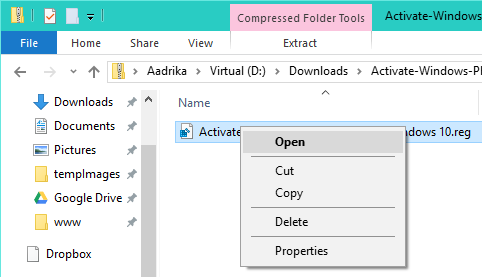
2. Once you’ve opened the zip file, you will find a file with .reg extension. Simply right-click on it and select the option “Open.”
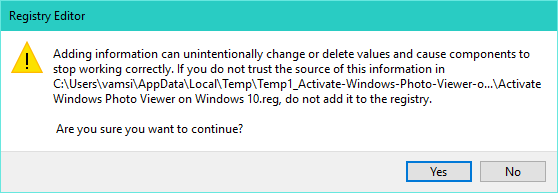
3. The above action will show you a little warning window. Simply click on the button “Yes” to continue.
4. Once the registry keys are added, Windows will show again show you a little window letting you know the same.

That’s all there is to do. You’ve successfully enabled the good old Windows Photo Viewer in Windows 10. Just restart or sign-out and sign-in to your system to start using it.
Set Windows Photo Viewer as Default
After enabling the Windows Photos Viewer, you need to set it as the default photo viewing application.
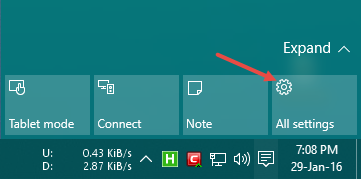
1. To do that, click on the notifications icon and the select the option “All Settings.” Alternatively, you can also use the keyboard shortcut “Win + I.”
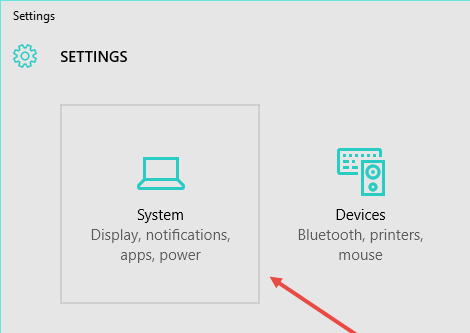
2. The above action will open the settings window. Since we need to edit the default app settings, select “System” option to continue.
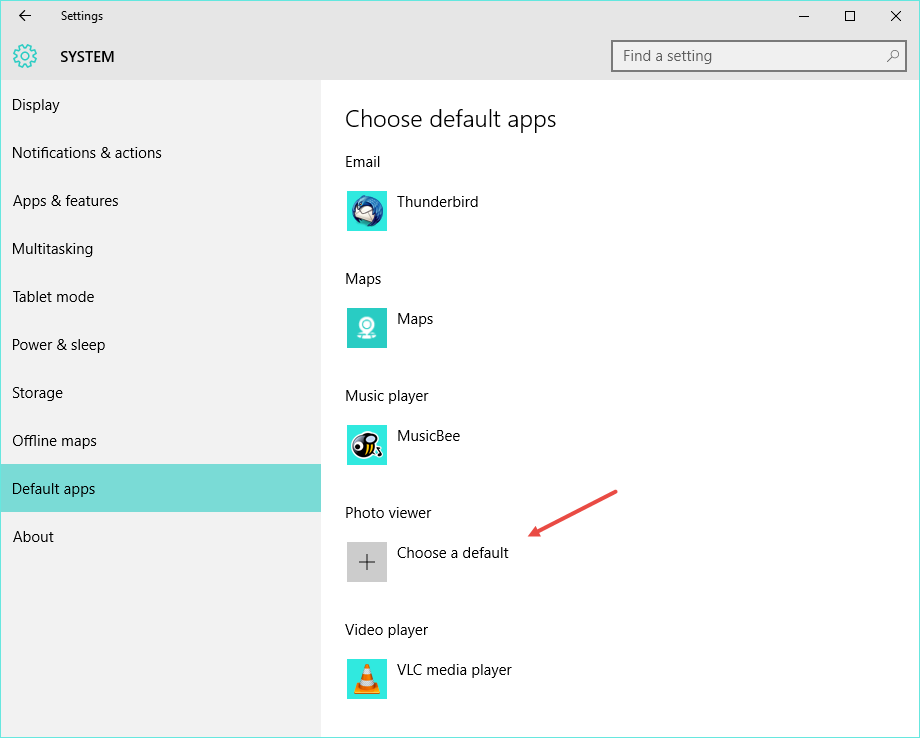
3. Once you are in the System panel, navigate to “Default Apps” on the left pane and then click on the button “Choose a Default” under “Photo Viewer.” Now, select Windows Photo Viewer from the list and you are good to go.
4. Alternatively, you can also set the Windows Photo Viewer as the default app based on specific image type. i.e, png, jpg, etc. To do that, right-click on the image you want to set Windows Photo Viewer as default and select the option “Open with” and then “Choose another app.”
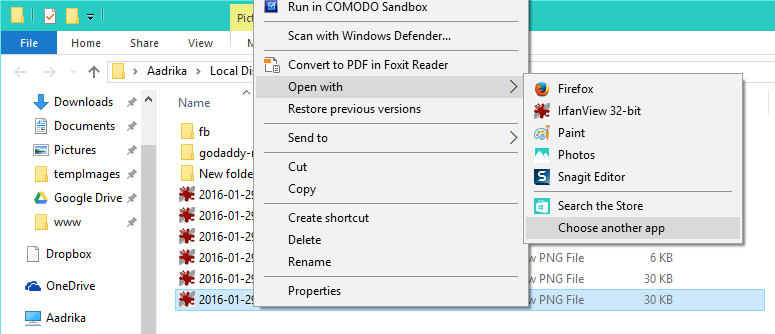
5. The above action will open the “Open with” panel. Here, scroll down and click on the link “More apps.”
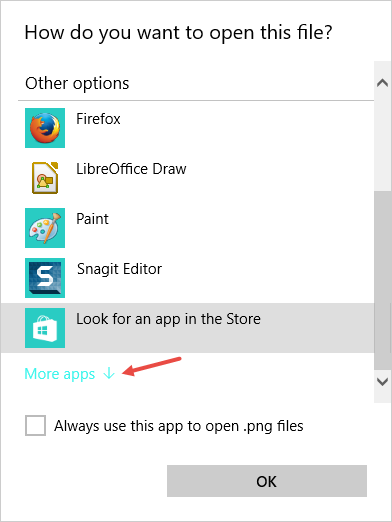
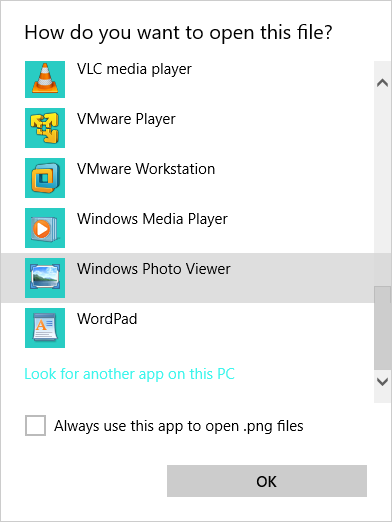
6. This action will reveal all the apps on the list. Simply scroll down and then select the option “Windows Photo Viewer” from the list. If you want to make it the default app for that particular image type then select the checkbox “Always use this app to open .extension files.” and you are good to go.
That’s all there is to do and it is that simple to enable Windows Photo Viewer app in Windows 10. Do comment below sharing your thoughts about the new Photos app and the good old Windows Photo Viewer desktop application.
As a side note, if you need a better and faster application to view your images then I would recommend IrfanView. It may look a bit old but is totally worth it.

