Want to test or try Linux Mint? All you have to do is install Linux Mint in VirtualBox. Linux Mint is one of the most popular Linux distros. The good thing about Linux Mint is that it is very beginner friendly, minimal, and uses fewer resources compared to Ubuntu. If you wish to try new Linux Mint OS then you can install it in a virtual machine using VirtualBox, no need to install it directly on your system. In case you are wondering, here’s how to install Linux Mint in VirtualBox.
Download VirtualBox and Linux Mint
If you haven’t already, download and install VirtualBox. You can install VirtualBox like any other Windows software.
Download latest Linux Mint build from the official site. Once you have both of these, you can proceed to install Linux Mint on VirtualBox.
Install Linux Mint in VirtualBox
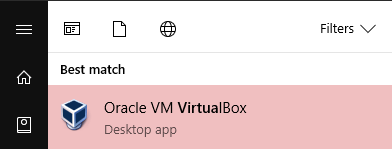
1. To install Linux Mint in VirtualBox, search for VirtualBox in the start menu and open it.
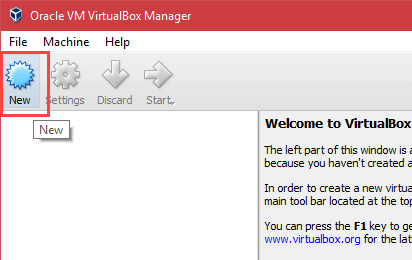
2. After opening VirtualBox, click on the button “New” on the top navigation bar.
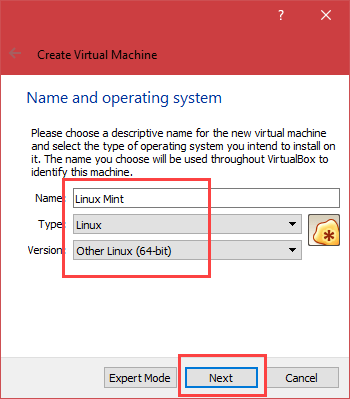
3. In the Create Virtual Machine window, enter the name of your virtual machine, select Type as “Linux” and Version as “Other Linux (64-bit).” If you’ve downloaded the 32-bit version of Linux Mint then select “Other Linux (32-bit)”.
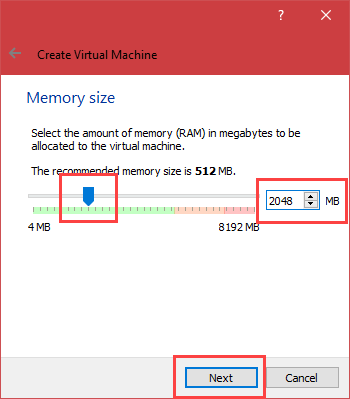
4. Here, select the memory size by sliding the bar. In my case, I’m assigning 2GB memory. At the minimum, assign at least 1GB to good performance.
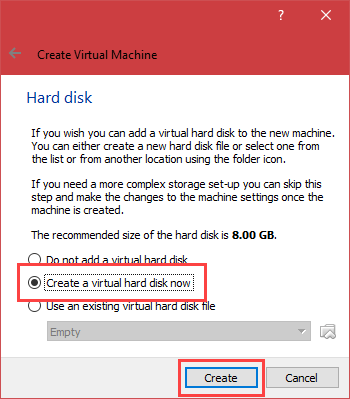
5. Select “Create a virtual hard disk now” and click on the button “Create”.
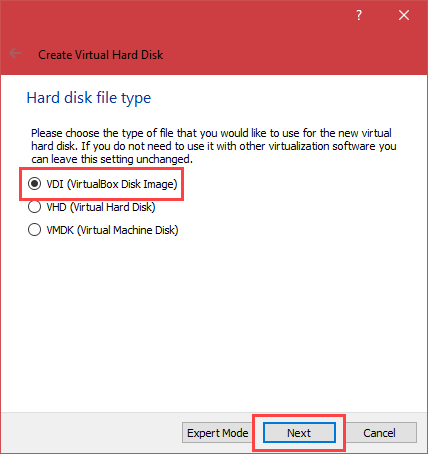
6. Now, select “VDI (VirtualBox Disk Image)” and click “Next” button.
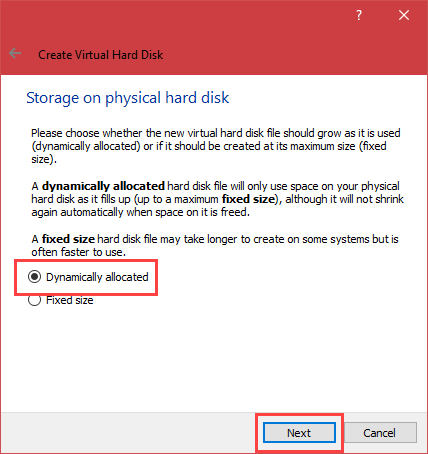
7. Here, select the radio button “Dynamically allocated” and click “Next” button.
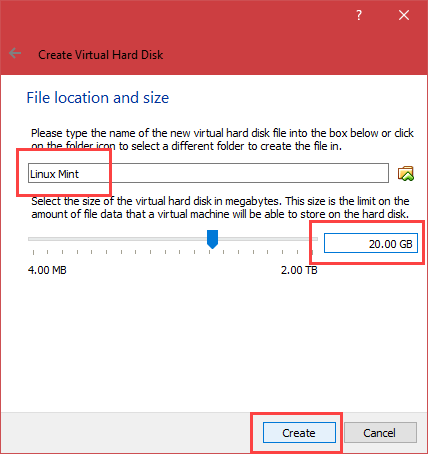
8. Enter the amount of hard disk size you want to assign and click on the “Create” button. In my case, I’m assigning 20GB hard disk space. Minimum recommended hard disk space is 8GB.
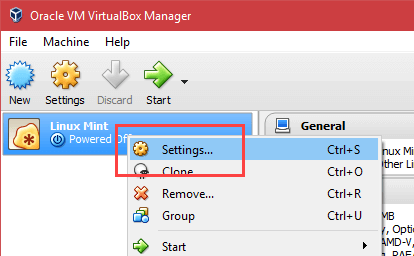
9. You’ve successfully created a virtual hard disk to install Linux Mint in VirtualBox. On the main window, right-click on the newly created virtual machine and select the option “Settings”.
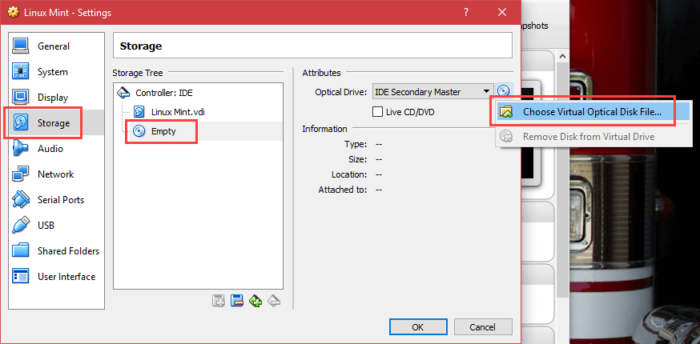
10. In the Settings window, navigate to “Storage” on the left pane, select “Empty CD drive” under Storage Tree section, and select “Choose Virtual Optical Disk File” from the drop-down menu.
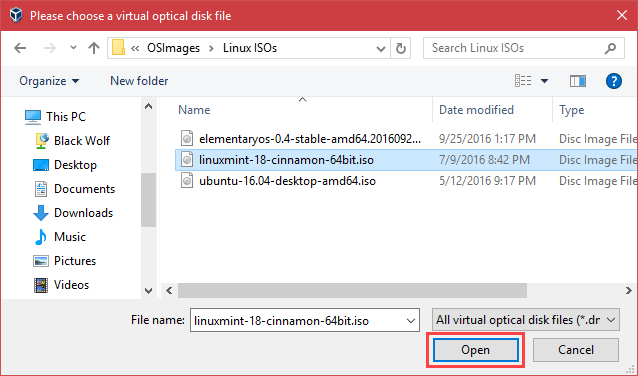
11. Navigate to the Downloads folder, select the downloaded Linux Mint ISO file and click on the button “Open”.
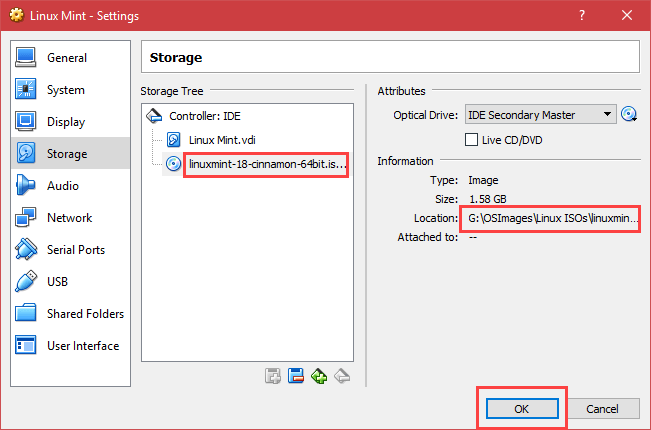
12. This is how it looks like in the virtual machine settings window. Click on the button “Ok” to save the changes.
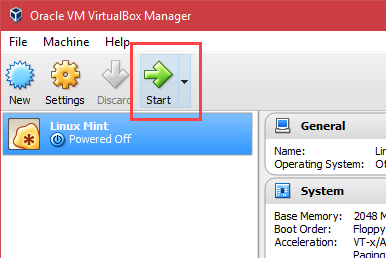
13. In the main window, click on the “Start” button to start the newly created virtual machine.
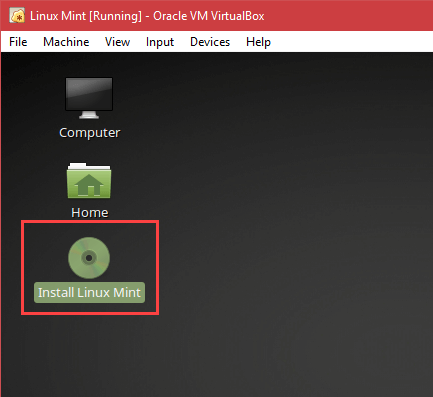
14. As soon as you start the virtual machine, you will boot into Linux Mint. Here, double-click on the option “Install Linux Mint”.
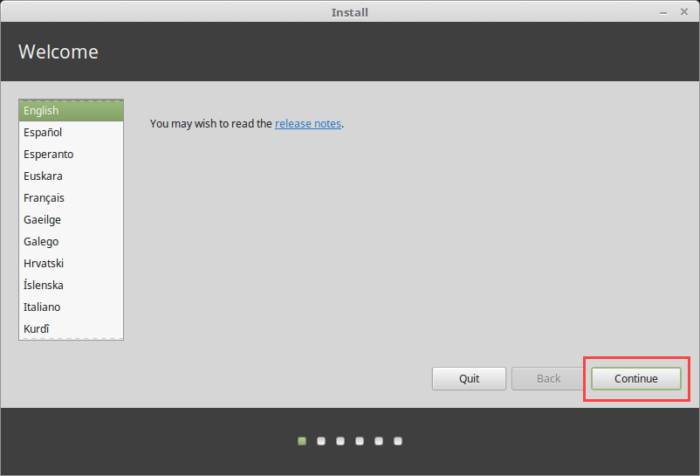
15. Here, select your language and click “Continue”.
16. If you want to download third-party software like codecs, select the checkbox and click on the “Continue” button. You can also install this third-party software after install Linux Mint.
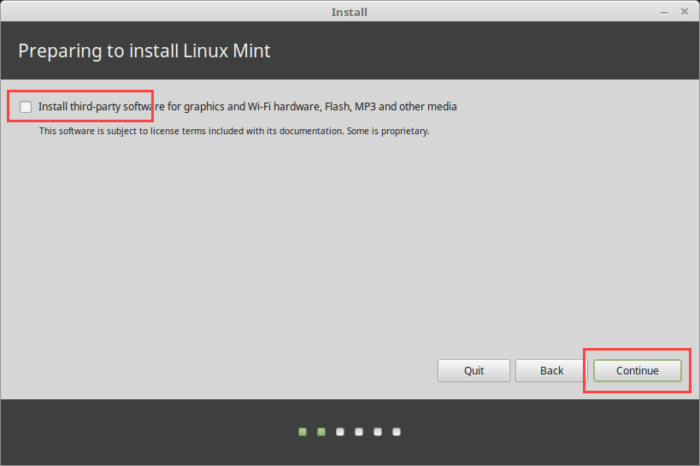
17. Select “Erase disk and install Linux Mint” and click on “Install Now” button.
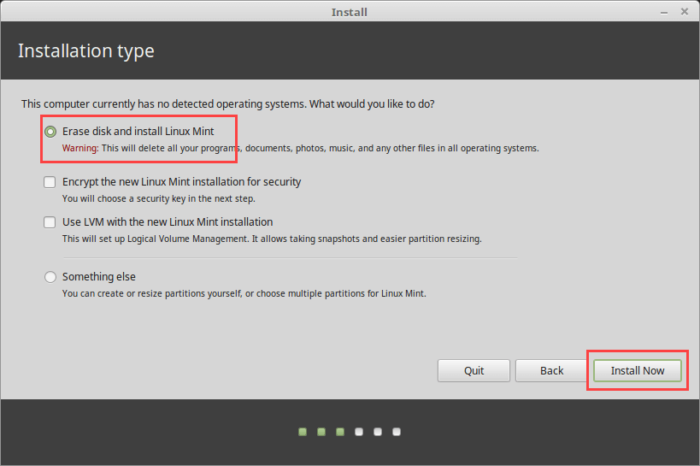
18. You will be prompted with a warning message. Simply click on the button “Continue”.

19. Now, select your country and click “Continue” button.
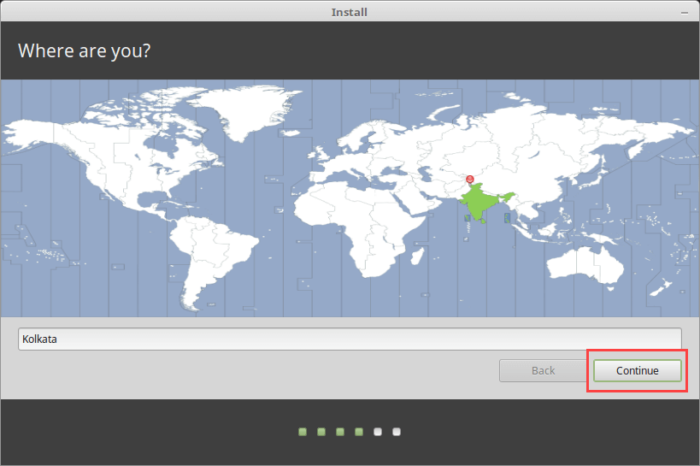
20. Here, select your keyboard layout and click “Continue”. By default, Linux Mint automatically detects your proper keyboard layout. If you want to verify, simply click on the button “Detect Keyboard Layout”.
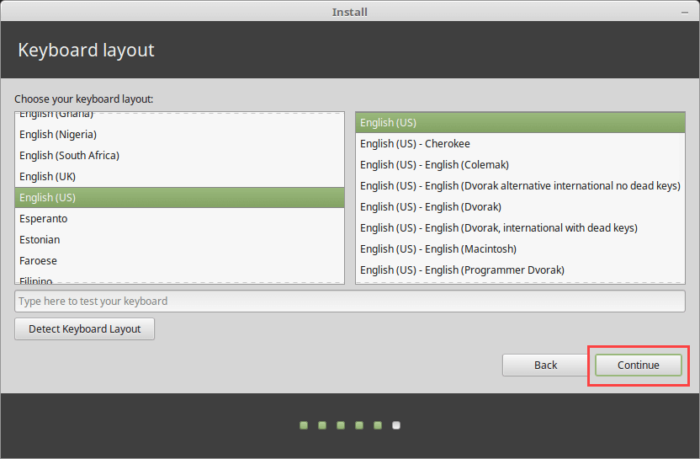
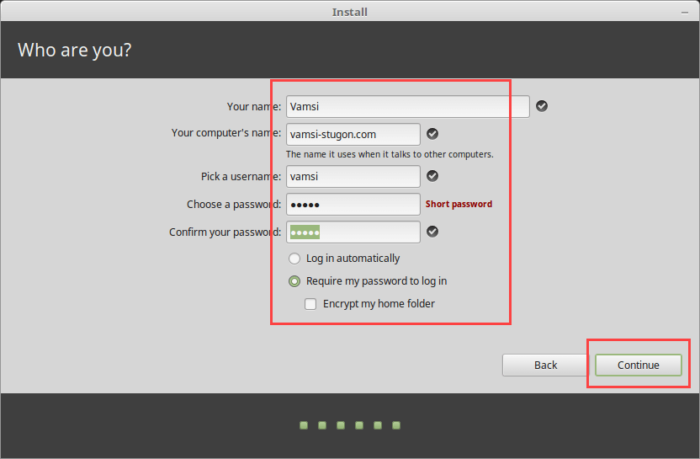
21. Enter your name, computer’s name, username, password and click on the button “Continue”.
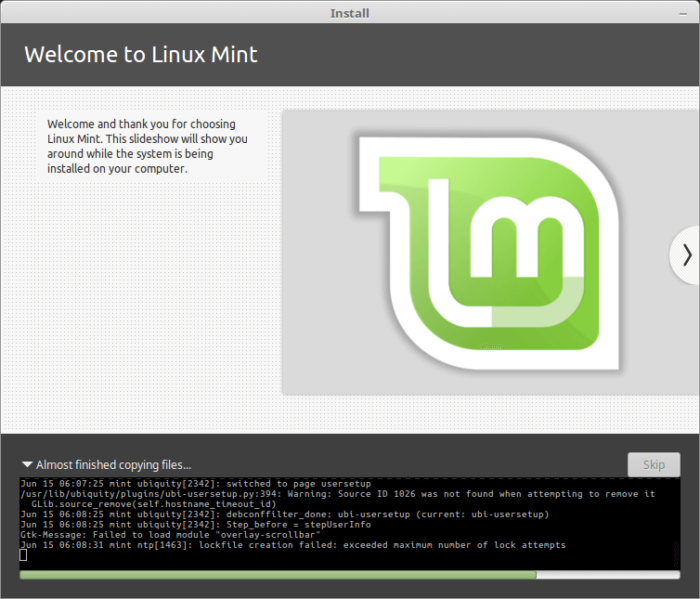
22. That’s it. Linux Mint will now begin the installation procedure. Just sit back and wait. The installation will be done in a few minutes.
23. Once the installation has been completed, you will be prompted to restart your virtual machine. Just click on the button “Restart Now.”

That’s all there is to do and it is that simple to install Linux Mint in VirtualBox. If you are again booted into the ISO image, then remove the disk image the virtual machine settings (refer step 10).
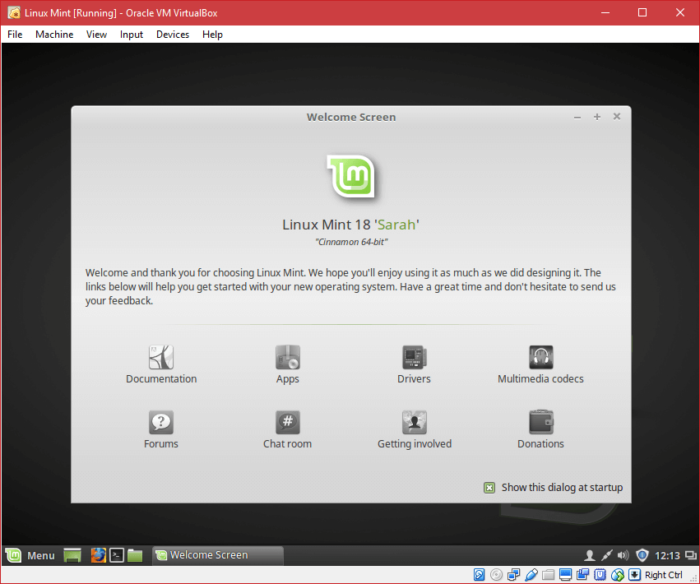
Hope that helps and do comment below sharing your thoughts and experiences about installing Linux Mint in VirtualBox.
Featured image credit: medithIT
