There are a lot of open source fonts available to use on the internet. However, there are some commonly used fonts on the Microsoft platform. If these fonts are not installed on your machine, some websites and documents which are designed with Microsoft Windows standard fonts may look a bit weird. Another instance where you need those Microsoft fonts installed in Ubuntu is when you use PowerPoint or Word documents written by MS office users.
In case you are wondering, here are some of the most commonly used or required Microsoft fonts.
- Andale Mono
- Arial Black
- Arial (Bold, Italic, Bold Italic)
- Comic Sans MS (Bold)
- Courier New
- Times New Roman (Bold, Italic, Bold Italic)
- Verdana (Bold, Italic, Bold Italic)
- Webdings
I’m listing below the various ways you can install Microsoft fonts in Ubuntu. Follow the one you are comfortable with.
1. Install Microsoft Fonts Using Terminal
The fastest way to install Microsoft fonts is to use the terminal. You can install the whole bundle of Microsoft fonts by following the below steps. To start off, press the keyboard shortcut Ctrl + Alt + T. This action will open the terminal.
Once the terminal has been opened, copy the below command and press the enter button.
sudo apt-get install ttf-mscorefonts-installer

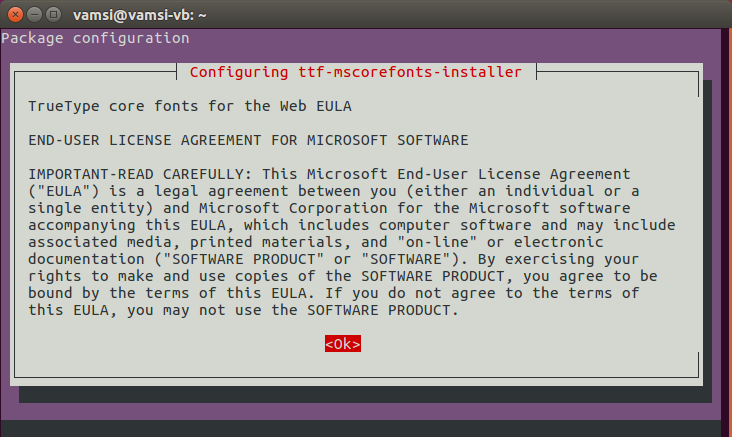
As soon as you execute the above command, you will be asked for your password. Type it in and press the enter button. Now, you will be asked to read the license agreement. Simply press the tab key on your keyboard to highlight the option “Ok” and then click on the button Enter on your keyboard.

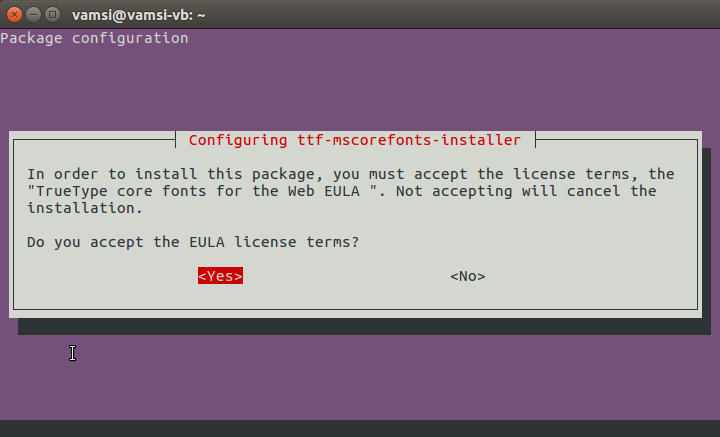
Now agree to the terms to install Microsoft fonts.

Once you are done installing, use the below command to refresh the font cache. If this didn’t work, simply restart your system to clear the font cache.
sudo fc-cache –fv
2. Install Microsoft Fonts Manually
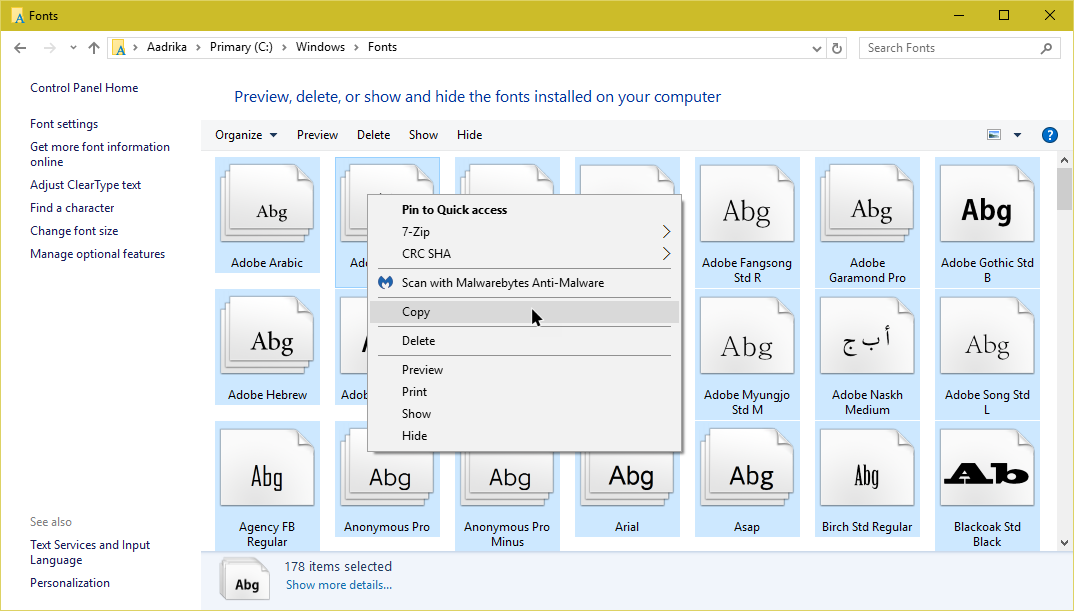
This method is useful for those who are dual booting or are networked to a Windows machine. You can copy the fonts directly from Windows and then install them in Ubuntu. To start off, log into your Windows machine, search for “Fonts” in the start menu and then open it. Now, select all the fonts using the keyboard shortcut Ctrl + A, right-click and then select copy.

Now, create a new folder, open it and paste all the fonts. Copy this folder onto your Ubuntu machine.
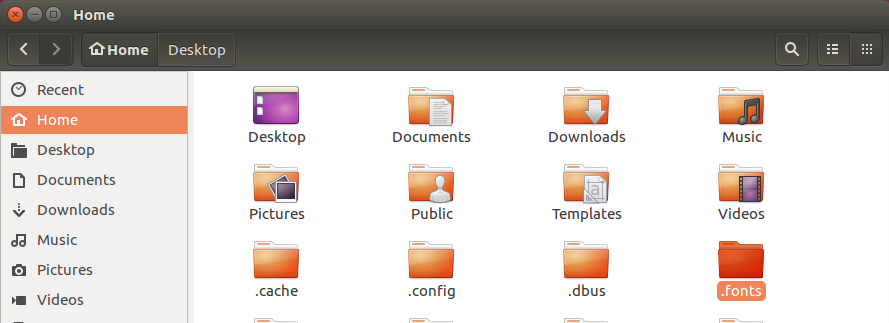
In your Ubuntu machine, open your home folder, create a new folder and name it “.fonts”. The “dot” in front of the folder name represents that it is a hidden folder.

Now, copy all TTF (True Type) fonts from the earlier folder to this folder. That’s all there is to do. You’ve successfully installed all the fonts.
Now you can restart the machine or refresh the font cache through the terminal using the below command.
sudo fc-cache –fv
3. Install Microsoft Fonts Using Software Center
This is the easiest way if you don’t want to deal with the terminal or with the manual installation. Simply open the Ubuntu software center, search for the package “ttf-mscorefonts” and click on the button “Install” to install Microsoft fonts in Ubuntu.
After installation, restart your system and you are good to go.
You can now read all the MS documents in the correct format. Do let us know if you found this guide useful in the comments section below.
