No software – or manmade thing for that matter – is foolproof. It is bound to have some problems from time to time. And the worst thing that can happen to you while working is a system crash. Apart from the data loss, it is the mental harassment that is more irritating.
Generally, you can easily create Windows system image backup with just a few clicks. But it may not be accessible at all times. So, it is always handy to have a system repair disc which can be helpful in such situations. In this article, I’m going to show you how to create system repair disk in Windows. It takes just about five minutes to have your very own system repair disc.
Note: creating a system repair disk is a pretty old feature in Windows. In fact, it still requires you to create it using a CD or DVD. So, make sure that you have CD/DVD drive and an empty CD or DVD. Moreover, though I’m showing this in Windows 10, the procedure is similar for Windows 7 and Windows 8.
Create System Repair Disk in Windows 10
1. Insert a blank CD in the CD drive of your machine. The repair disc will take up at least 140MB – 150MB of your CD space.
2. Click on Start, search for “Backup and Restore” and then open it.

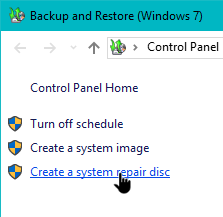
3. Here in this window, click on the link “Create System Repair Disk” appearing on the left pane.

4. In the pop-up dialogue box, you can select the CD drive using the drop-down menu. If there is not disk inserted, you will receive a warning message.
5. Now, click on the “Create disc” button.
6. The Windows operating system will now create a system repair disc on your blank CD. No special CD burning software is required.
7. Close the dialogue box once the system repair disc operation has been completed.
8. Click the OK button back on the original “Create a system repair disc” window.
9. Just take a marker and label the CD as Windows repair disc and keep it somewhere safe.
You can now use this system repair disk in case of any emergency like a system crash. After booting from this disc, you will have access to the System Recovery options. This is where you will find all system recovery tools available for the Windows operating system. However, do note that the system repair disk you create in your system will only work with your system. i.e, it will not work with any other Windows systems.
You will need to watch for “Press any key to boot from CD or DVD” message on screen while booting from the disk and press any key on your keyboard. This will take you to the actual repair environment where you can do a system restore or system repair.
Hope you found this guide useful. Feel free to comment in case I missed anything or if you have any questions.
