Even though the SSDs and traditional hard drives are getting lower in price and larger in size (as in GBs and TBs), you sometimes find yourself with situations where you don’t have enough space in a partition or drive for essential programs and files. You will face this kind of situation typically in your C drive as it is the default save location for different folders like Downloads, Music, Videos, cloud storage, etc. In those conditions, you have two options. i.e, you can either move all the data in the folder to a new folder manually or you can just move the entire folder so that you change the location address system wide. So, if you ever face space constraints, here is how you can change the folder location in Windows 10.
Change Folder Location in Windows 10
Note:
- If you are looking to move the default save locations of apps, documents, music, pictures and videos on your C drive, then Windows 10 has a simpler way. Just open the Settings app and then navigate to “System > Storage.”
- The below method is also applicable to Windows 7 and 8.
Changing folder location in Windows 10 is pretty easy and straight forward. As most of you know, the Downloads folder in your Home folder will host all the files you downloaded from the internet. By moving the folder properly, you don’t have to edit the location in different applications like browsers, download managers, etc.
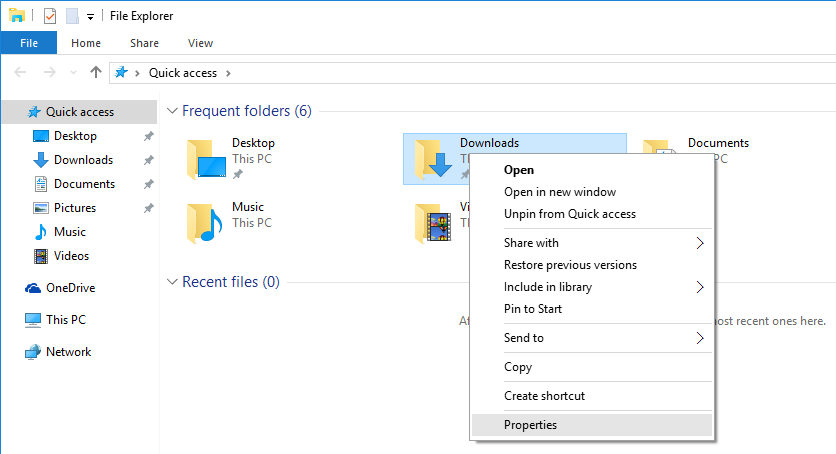
To start off, find the folder you want to move, right-click on it and then select the option “Properties.” Since I want to move the Downloads folder, I selected the properties of that folder.
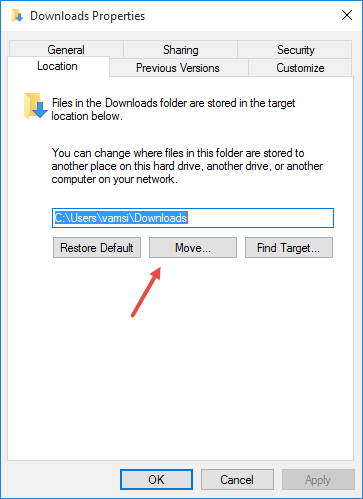
Once the folder properties window has been opened, navigate to the “Location” tab and click on the button “Move” to start the moving process.
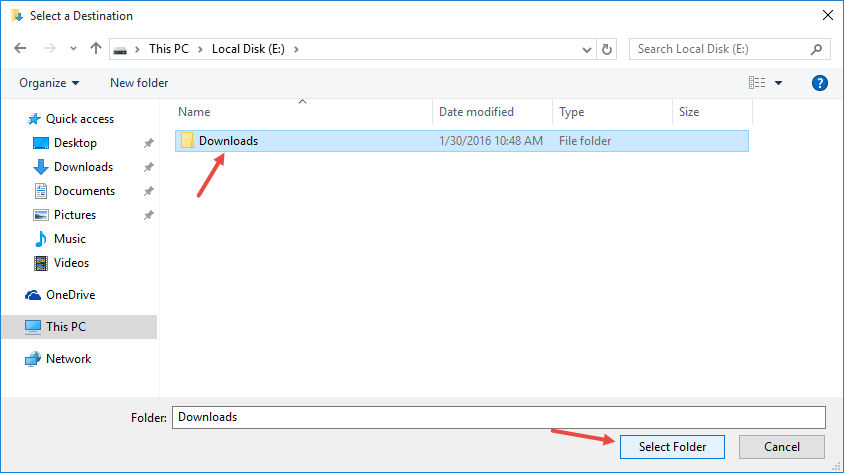
The above action will open the “Select a Destination” window. Here, navigate to the partition where you want to move the folder and create a new folder.
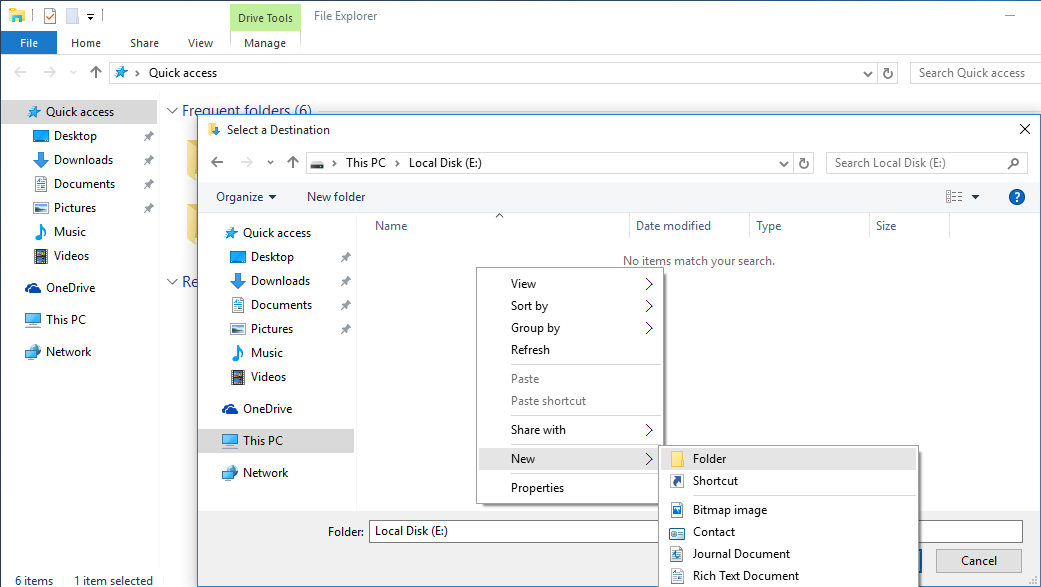
After creating a folder, select it and click on the button “Select Folder.” In my case, I’ve created a new folder with the name Downloads in my E drive and then selected it. You can select any folder you want.
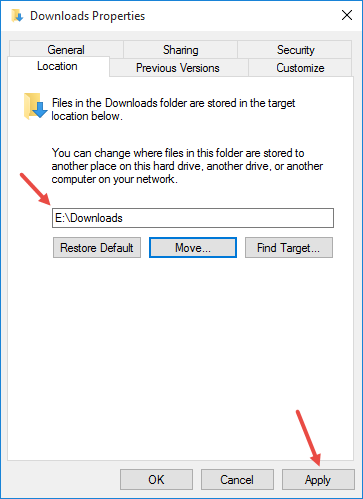
As soon as you’ve done that, the properties window will show you the changes. Simply click on the button “Apply.”
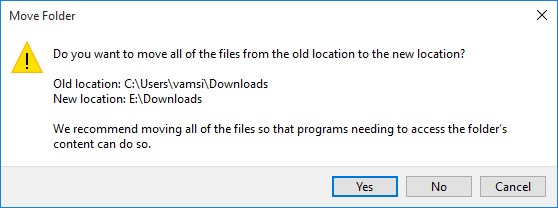
The above action will show you a little information window. Simply click on the button “Yes” to continue. In case you are wondering, when you click on the button “Yes,” Windows will move all the files and folders in the old location to the new location.
If you don’t want to move the files inside the folder then click on the button “No.”
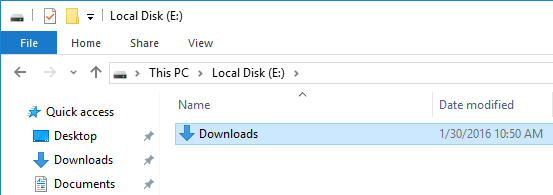
That’s all there is to do and you’ve successfully changed the folder location in Windows 10.
Do comment below sharing your thoughts and experiences about using the above method to change folder location in Windows 10.

